
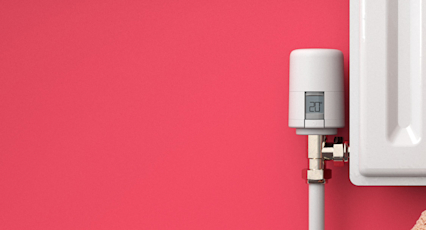
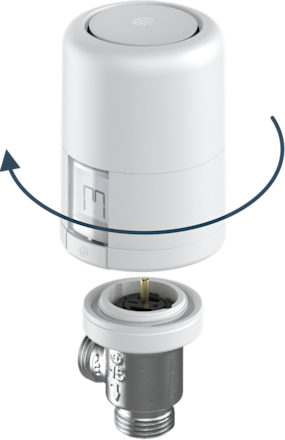
Remove your old radiator control
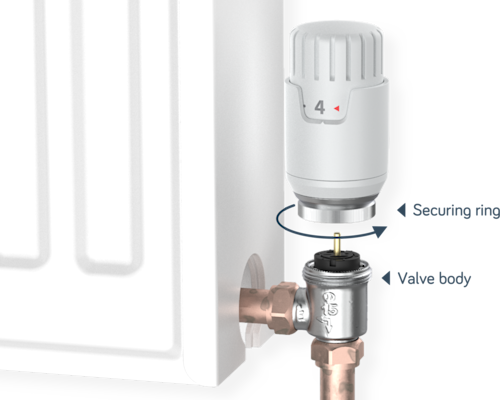
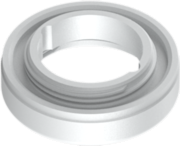
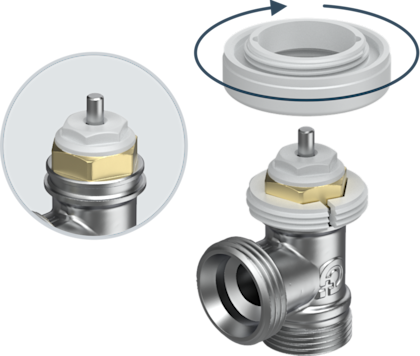
Most radiator controls can be removed by unscrewing the valve securing ring.
If your existing control doesn't unscrew easily, set it to its highest temperature setting (eg “5”) and try again. Be careful to only unscrew the control and not the valve body itself.
If it still doesn't unscrew, it may be stuck or might have a different locking mechanism. In this case we recommend you contact a plumber for assistance.
If you see a few drops of water when you unscrew your old radiator control then your existing valve body may be leaking. Valve bodies can often be tightened up, but some might need replacing if they are leaking. We recommend fixing your valve body before installing your Hive Radiator Valve. Get advice from a plumber if you’re unsure of how to do this.
Remember: If your radiator has manual (“+ / -”) valves rather than thermostatic valves (with a numbered dial) then your valve body will need to be replaced before proceeding.
Finally, Hive is not responsible for any damage that you cause to your heating system while removing your old control. If in doubt, please do get advice from a plumber!
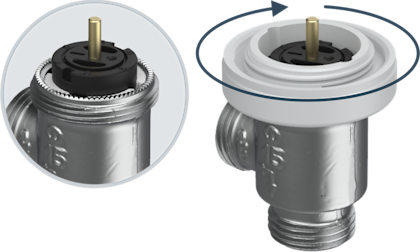
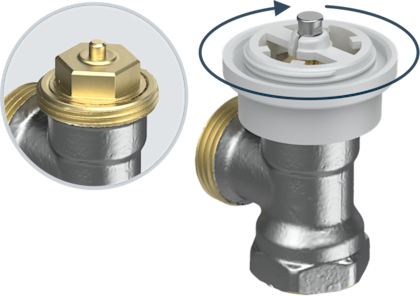
Check your radiator valve pin is ready
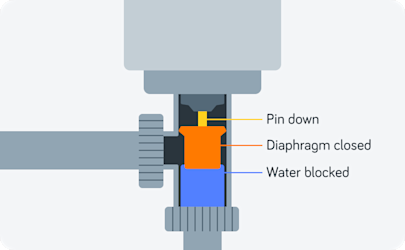
After removing the old radiator control you should now see your radiator valve pin (the shape of the pin can vary and may look different to the image above).
Your radiator's valve pin controls how much hot water flows into your radiator. When the pin is pushed all the way down, the rubber diaphragm inside closes and stops water from getting in.
Hive Radiator Valves use a motor to allow the valve pin to move up and down and so control how much hot water flows into the radiator.
If the pin is stuck and the Hive Radiator Valve motor can't easily move it up and down, it cannot effectively control the heat coming from the radiator.
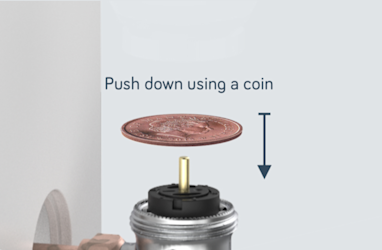
To ensure that the Hive Radiator Valve can accurately control the flow of hot water into a radiator, use a coin to push down on the pin to check that if moves up and down freely.
Tip: If it feels stiff, or if there is limescale or corrosion visible, clean this off and try to free the pin using lubricant.
Identifying the right adaptor: valve bodies with screw threads
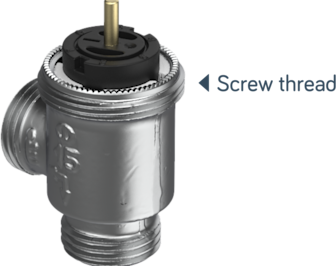

You’ll need to select the correct adaptor to fit your Hive Radiator Valve to your existing valve body. If your valve doesn’t have a screw thread, see the next section.
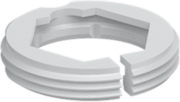
If your valve does have a screw thread, use the adaptor guide included in the box to help identify the right adaptor.
If the guide sits on top of the screw thread on your valve then you need an M30 adaptor.
If the guide slips over the screw thread and slides down, then you need an M28 adaptor.
Sits on top of the screw thread

Fits over the screw thread
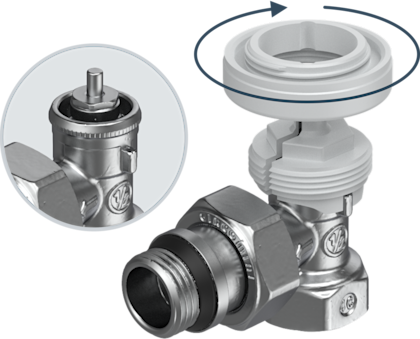
Identifying the right adaptor: valve bodies with no screw thread
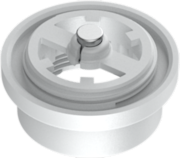
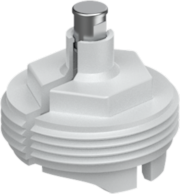
If your valve does not have a screw thread, match your valve to the pictures.
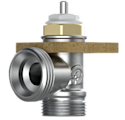
Danfoss valves require the RA adaptor.
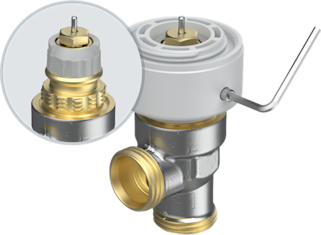
Valves with two wings sticking out the sides require the Giacomini adaptor.
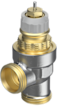
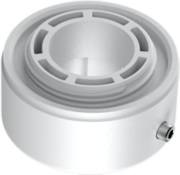
Valves with a hexagonal top and no screw thread require the Caleffi adaptor.
Hive does not provide adaptors for other valve types. In order to install Hive Radiator Valves you will need to replace your current valve bodies with one of the standard types supported by Hive. A plumber can help with this.
RA
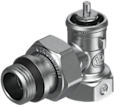
Giacomini

Caleffi
Fitting the adaptors: M30
Slip the M30 adapter over the radiator valve and screw clockwise until securely fastened.
Continue to next stepFitting the adaptors: RA
The RA adaptor is the only adaptor that has a screw. Slip the adaptor over the radiator valve and use the hex key provided to securely fasten it.
Make sure you fit the adaptor the right way up, the thread should be facing upwards and the screw should be near the bottom.
Continue to next stepFitting the adaptors: M28
An M28 adaptor is not included in the box. If you require one, please contact support.
To fit an M28 adaptor, slip it over the radiator valve and screw clockwise until securely fastened.
If the M28 adaptor seems to be the right size but will not screw on, you may have an "M28 x1.0" valve body with a narrower screw thread. These bodies are sold by brands such as Orkli, Concerto and Wessex. Hive does not have an adaptor for this valve type. In order to install Hive Radiator Valves you will need to replace your current valve bodies with one of the standard types supported by Hive. A plumber can help with this.
Continue to insert batteriesFitting the adaptors: Giacomini
A Giacomini adaptor is not included in the box. If you require one, please contact support.
To install, first slip the Giacomini adapter over the radiator valve. Push it on firmly until it clicks securely into place.
Then slip the M30 adapter over the Giacomini adaptor and screw clockwise until securely fastened.
Continue to next stepFitting the adaptors: Caleffi
A Caleffi adaptor is not included in the box. If you require one, please contact support.
First, slip the Caleffi adapter over the radiator valve with the hexagonal side facing towards you. Push it on firmly until it clicks securely into place, and make sure that it is correctly lined up with the hexagonal part of the valve.
Then slip the M30 adapter over the Caleffi adaptor and screw clockwise until securely fastened.
Continue to next stepInsert the batteries
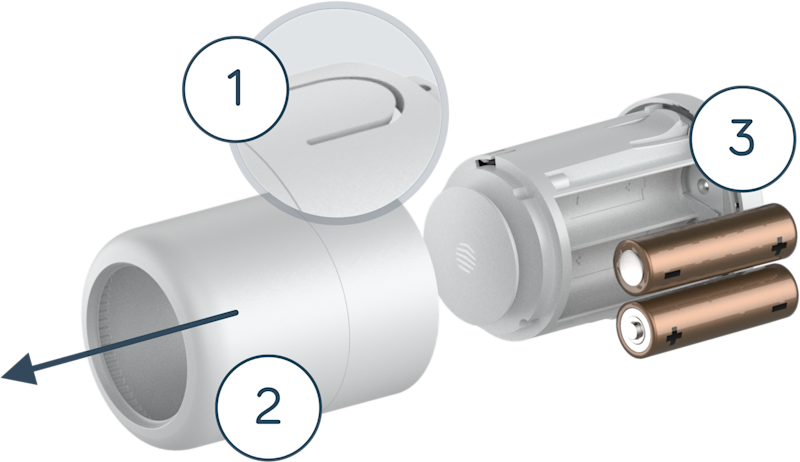
Press down the 'tab' and slide the casing off the Hive Radiator Valve. Insert the two AA batteries included and slide the casing back on, taking care to line the window up with the screen. You will hear a click when it’s in place.
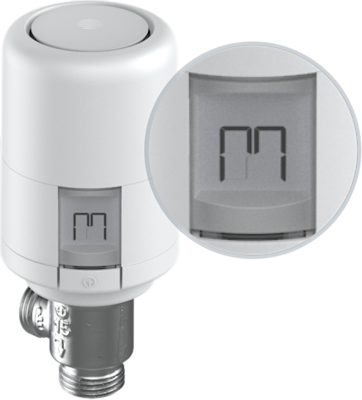
The screen will light up and show an “M” symbol to indicate that the Hive Radiator Valve is in install mode.
If your Hive Radiator Valve is showing a temperature rather than the “M” symbol, you will need to reset it.
Fit onto the radiator
Screw the Hive Radiator Valve onto the adaptor, rotating clockwise until you feel a click. Stop after the first click to avoid damaging your valve.
Now rotate the casing back the other way until you can see the screen.
If you aren’t using the app to guide you through the installation, you can now press the button below the screen for 3 seconds to exit install mode and your valve will show target temperature.
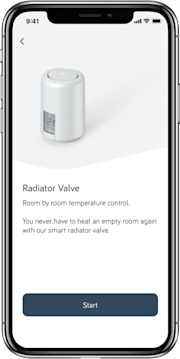
Open the Hive App
Once you have completed all the steps to fit the Hive Radiator Valve to the radiator, please return to the Hive App so you can pair it to the Hub.
If you haven't launched the app yet, you'll need to select "Radiator Valve" from the install menu to get started.